
Sharing Your Study and Recruiting Participants
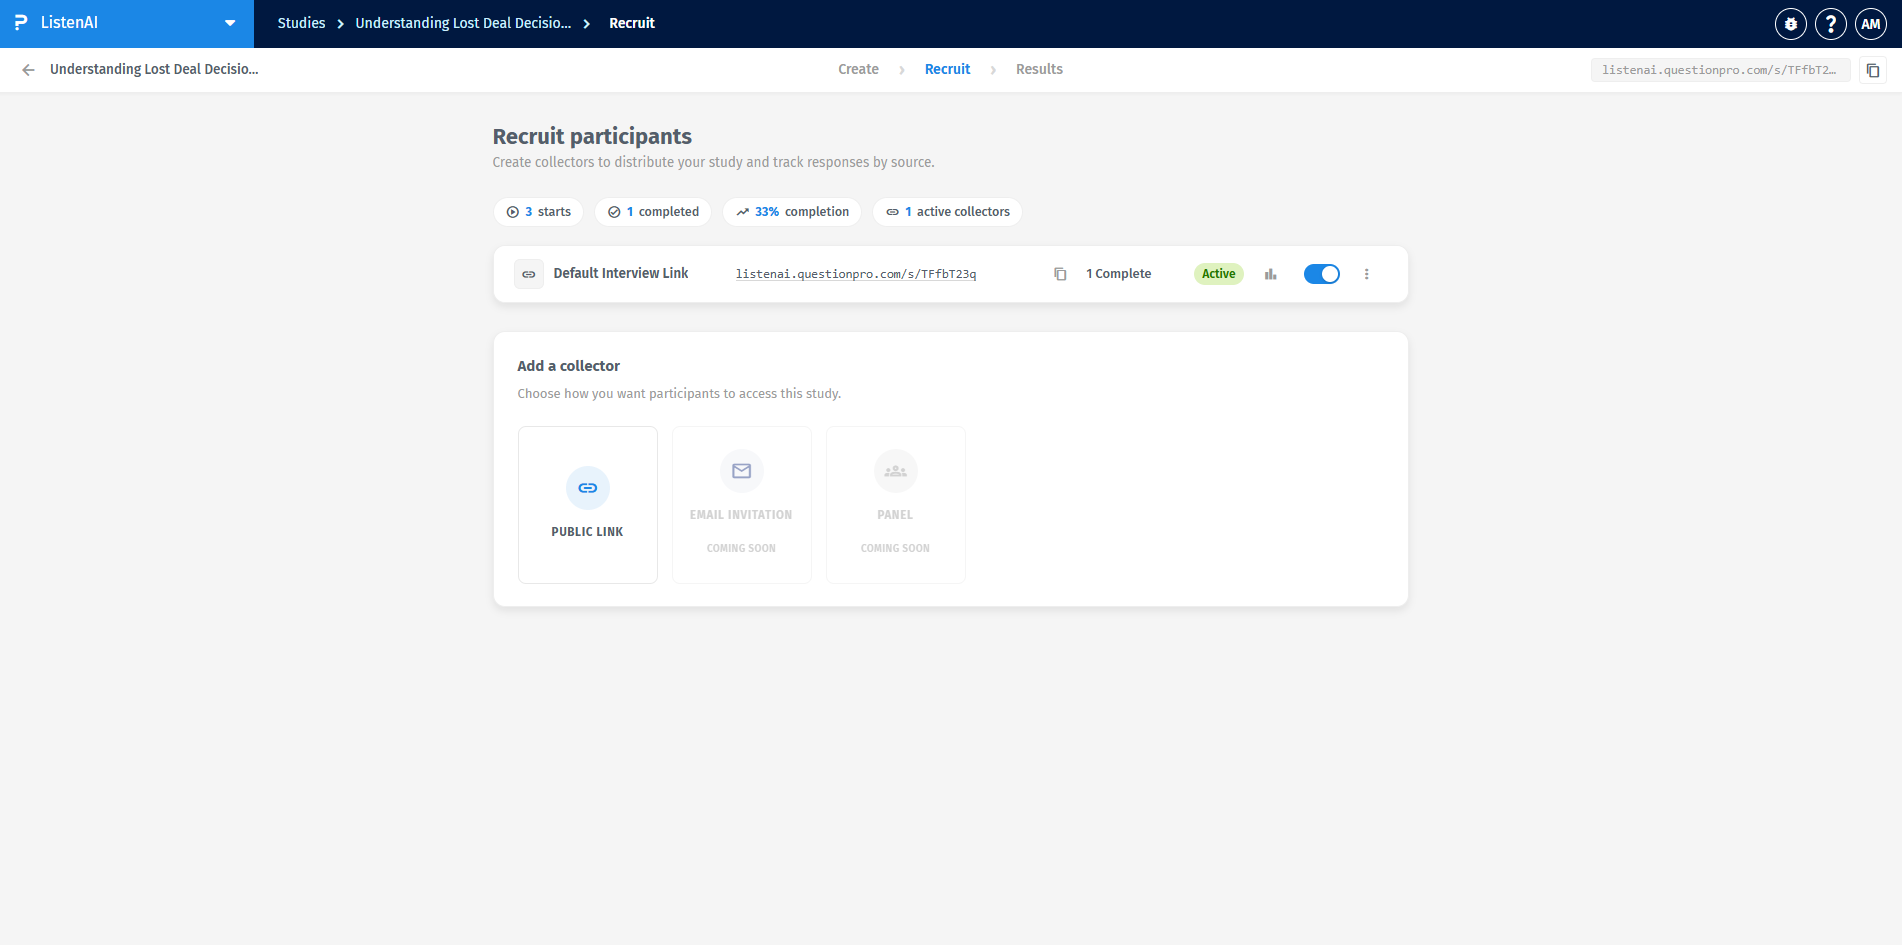
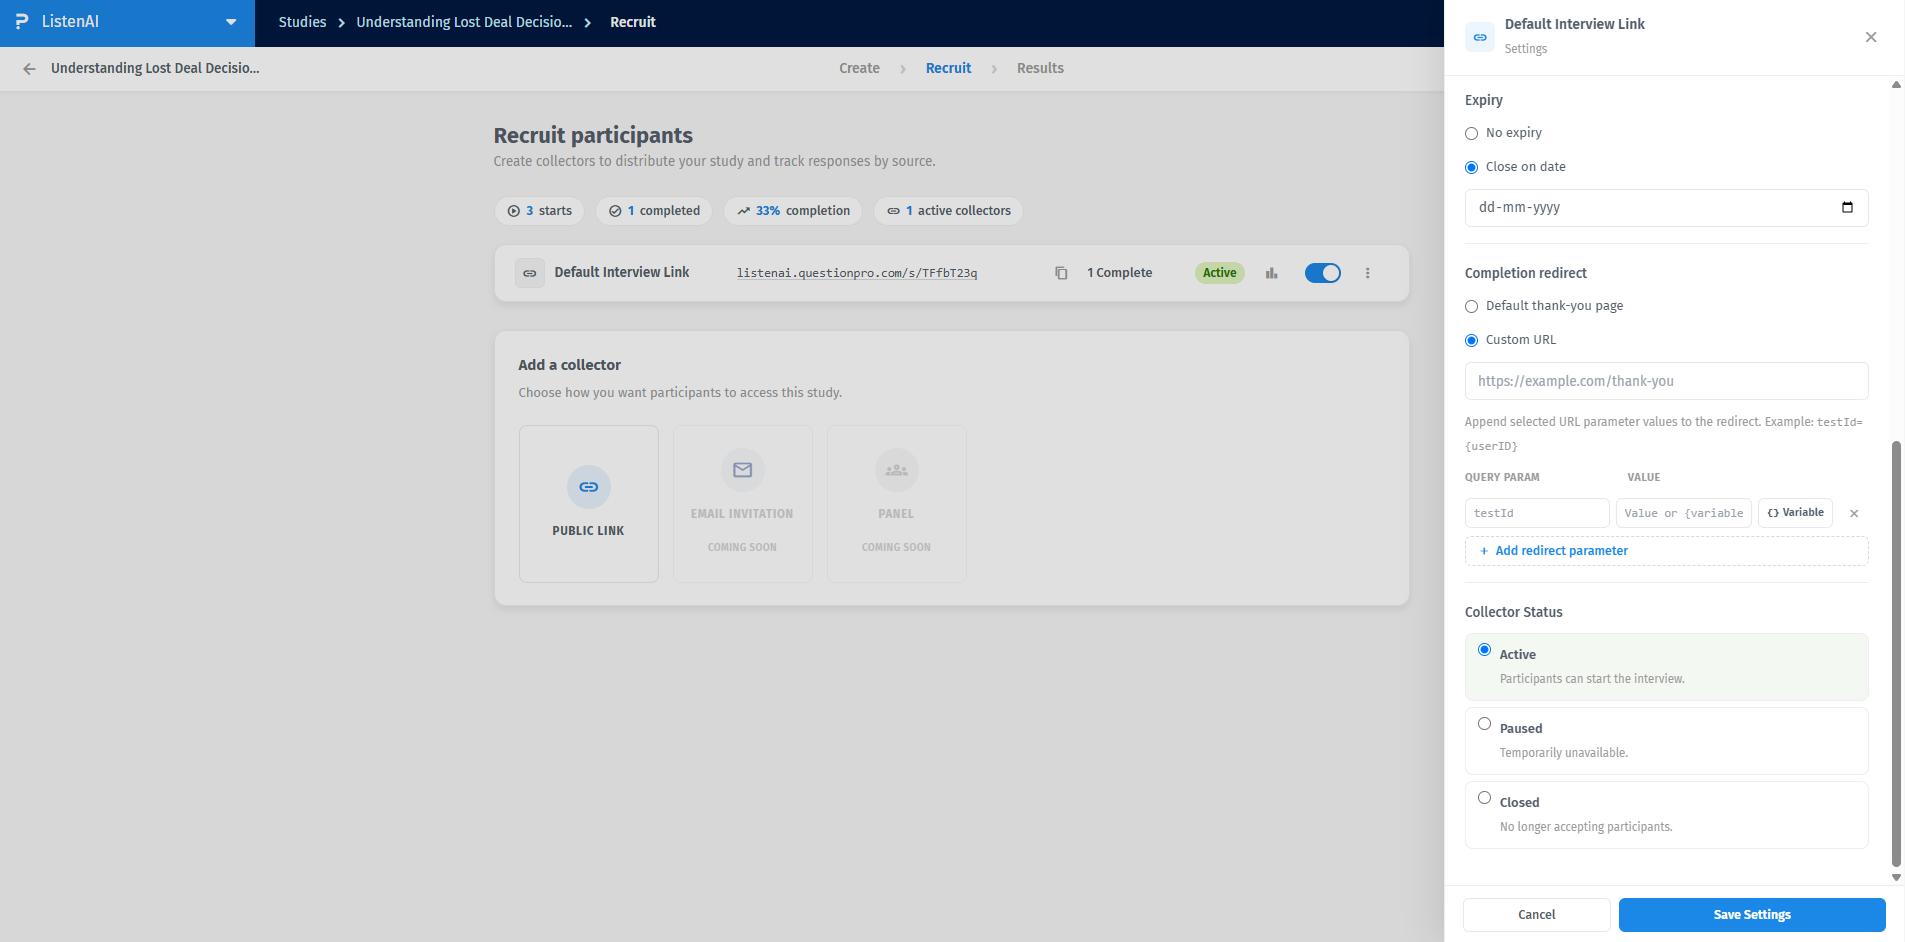
To distribute your study and track responses by source, navigate to the Recruit tab. Here you can view your recruitment dashboard, which displays the number of starts, completed interviews, completion percentage, and active collectors.
Under the "Add a collector" section, click on PUBLIC LINK to generate a new way for participants to access this study.
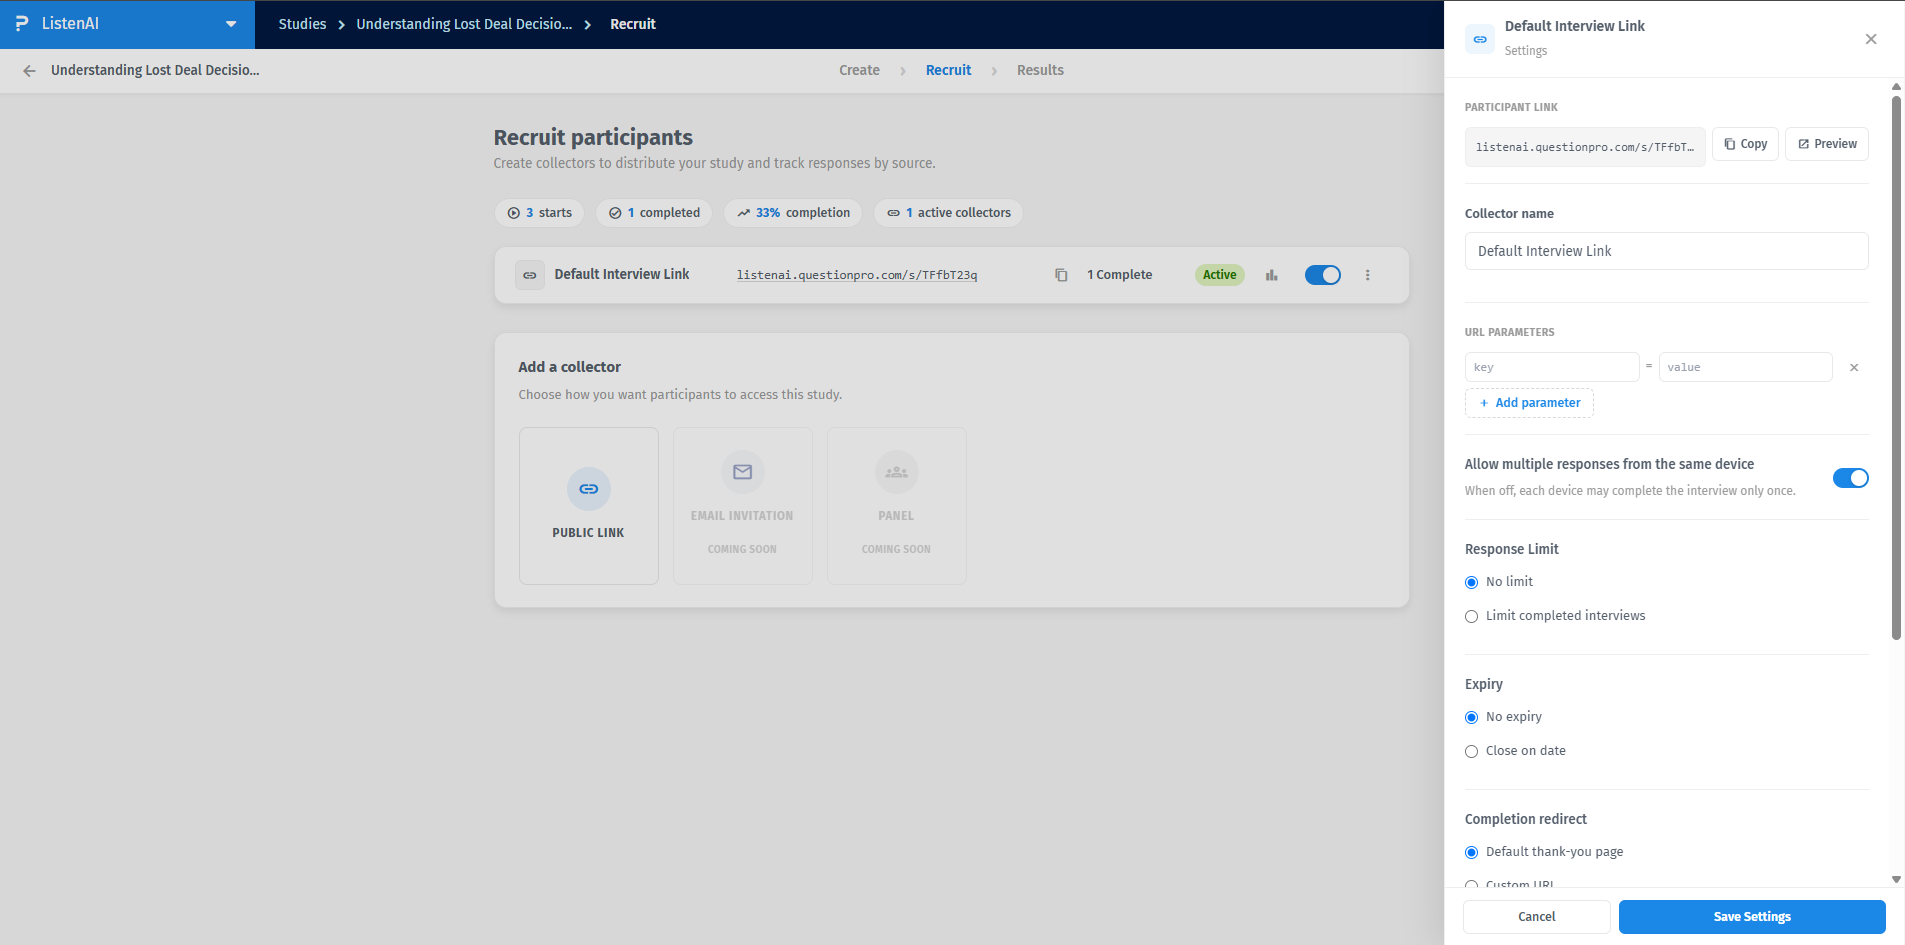
Clicking on your collector opens the Settings side panel. From here, you can Copy or Preview the Participant Link, and define a custom Collector name.
To track specific participant data, you can add URL PARAMETERS by defining a key and a corresponding value. You also have a toggle option to "Allow multiple responses from the same device" if you want participants to be able to complete the interview more than once per device.
Within the collector settings, you can control the Response Limit by selecting "No limit" or choosing "Limit completed interviews" and entering a specific number of allowed completions.
You can also define an Expiry for the link by selecting "No expiry" or selecting "Close on date" and using the calendar input to set a deadline.
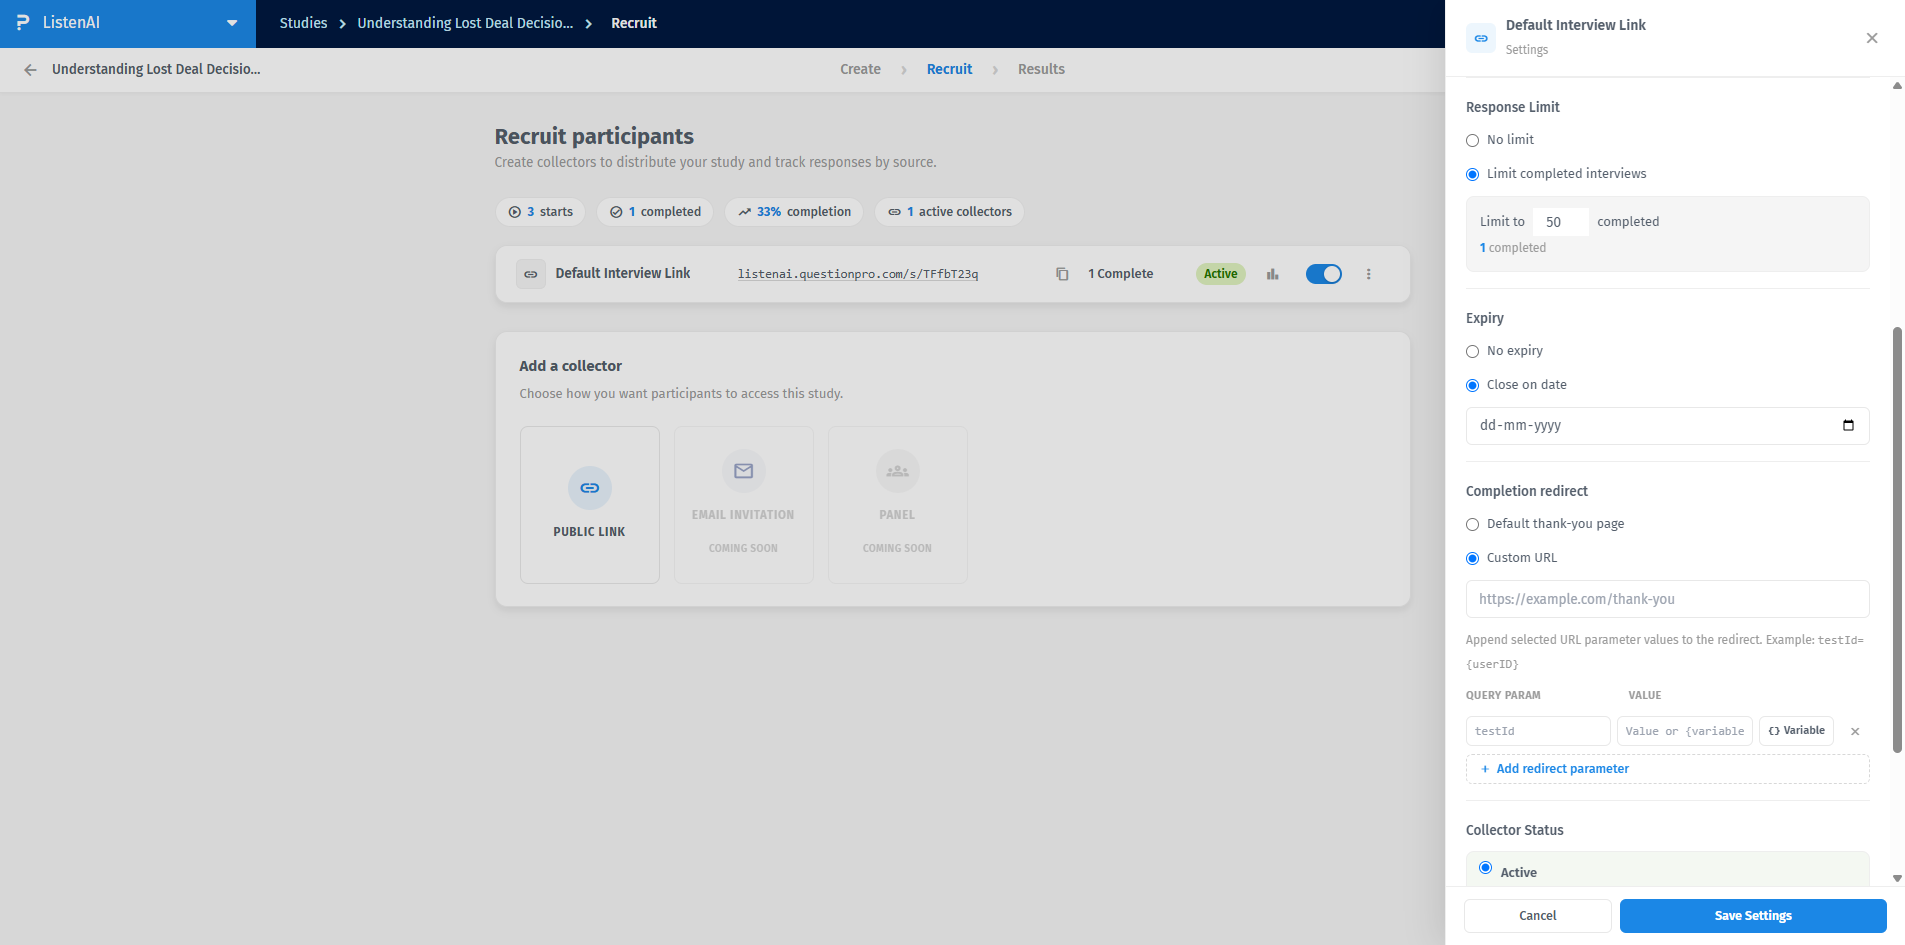
In the Completion redirect section, you can direct participants to the "Default thank-you page" or specify a "Custom URL" for panel integrations or seamless handoffs. When using a custom URL, you can append selected URL parameter values to the redirect by clicking "+ Add redirect parameter".
To manually control whether the link is open or closed, adjust the Collector Status:
- Active: Participants can start the interview.
- Paused: Temporarily unavailable.
- Closed: No longer accepting participants.
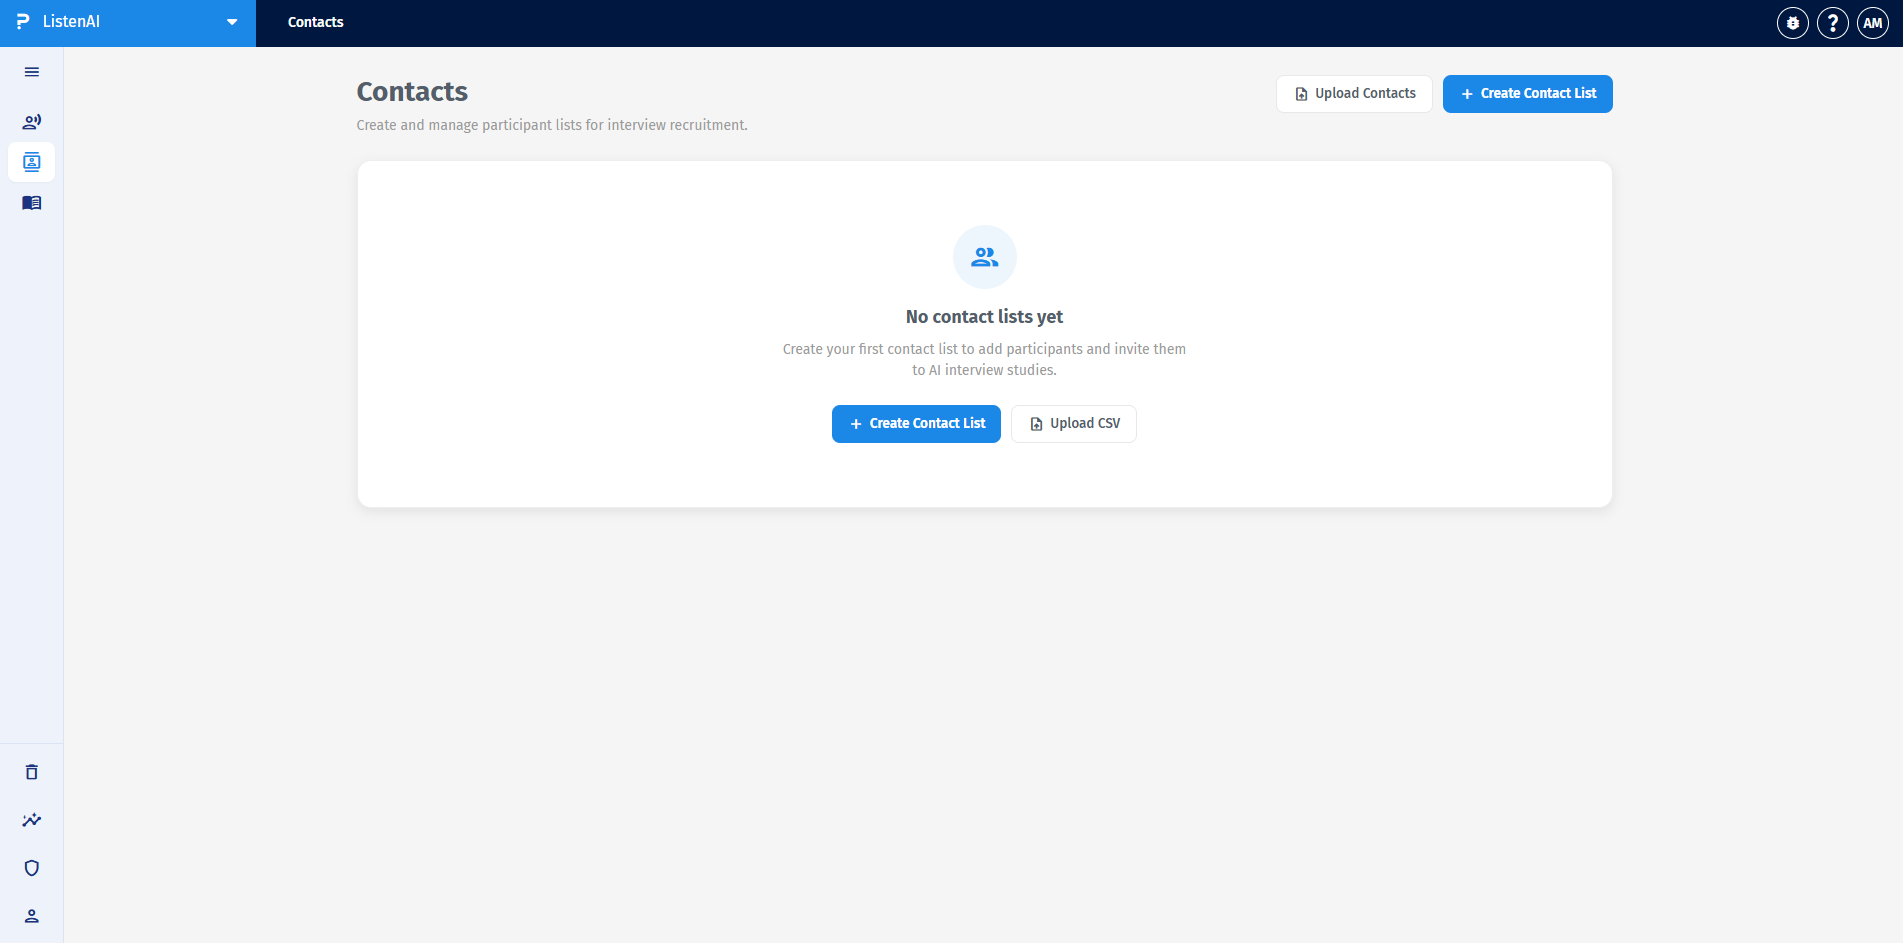
If you have a known pool of participants, you can create and manage participant lists for interview recruitment by navigating to the Contacts tab. Click the Create Contact List button to begin.
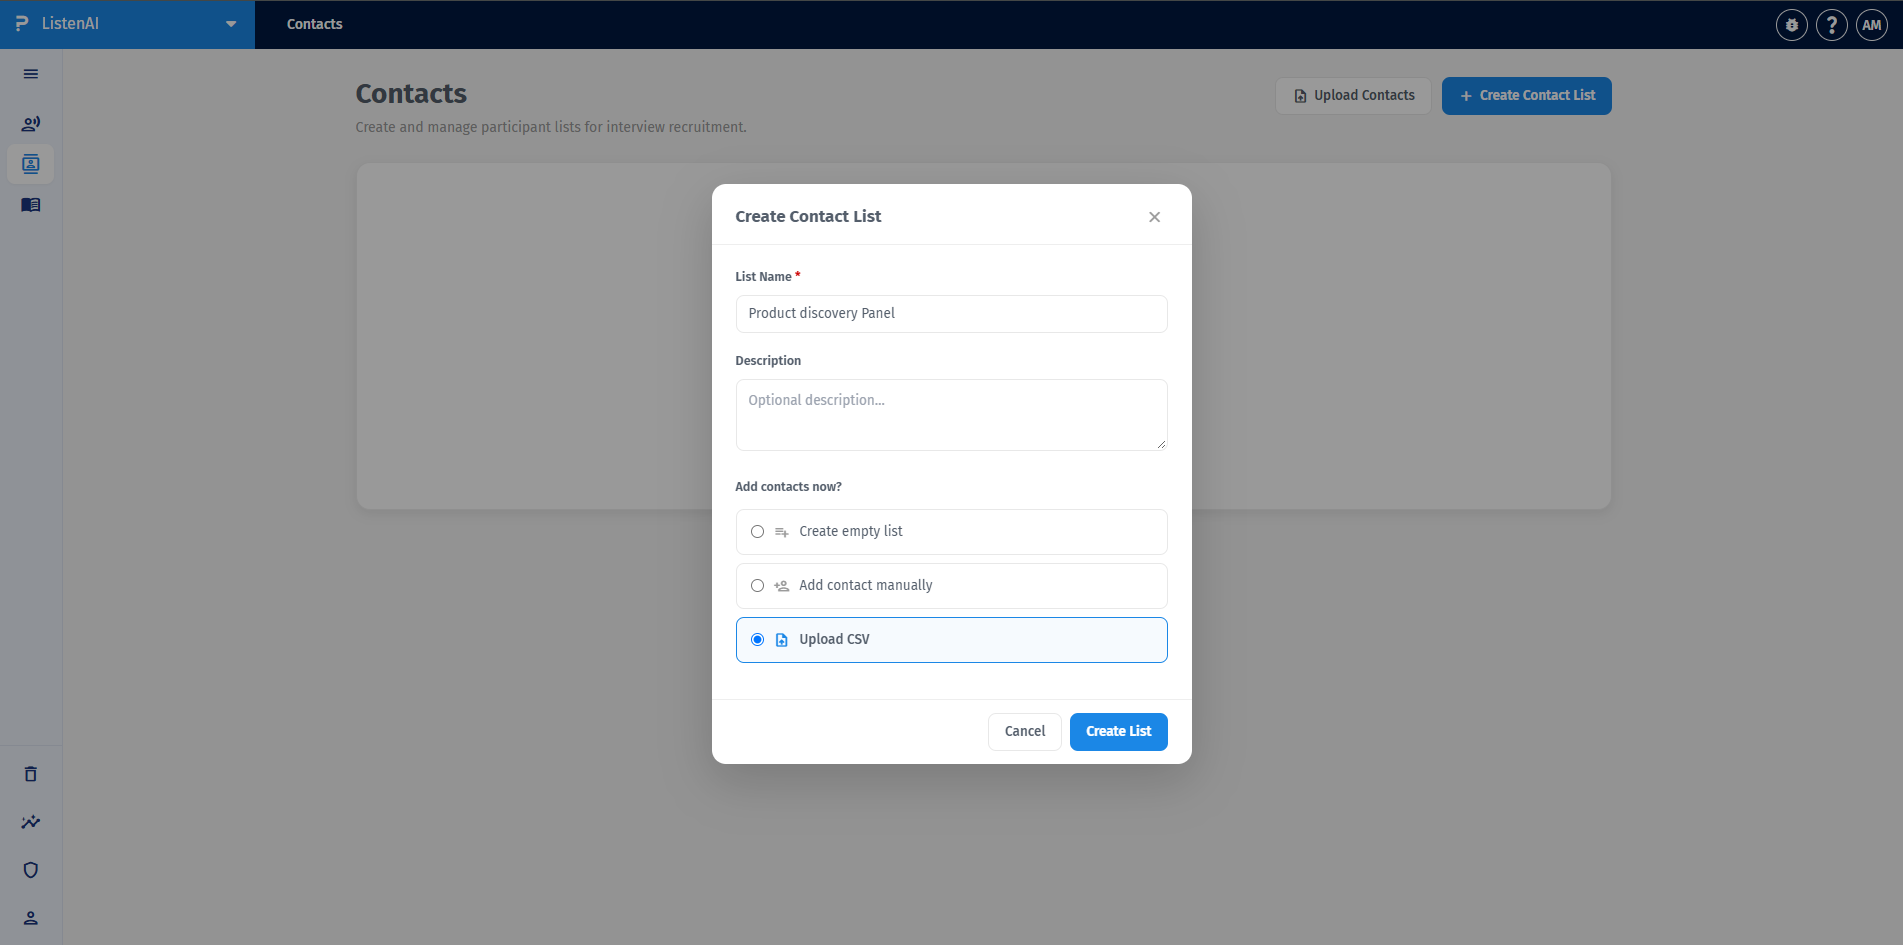
In the creation modal, enter a required List Name and an optional Description. You can choose to add contacts by selecting "Create empty list", "Add contact manually", or "Upload CSV", then click the Create List button.
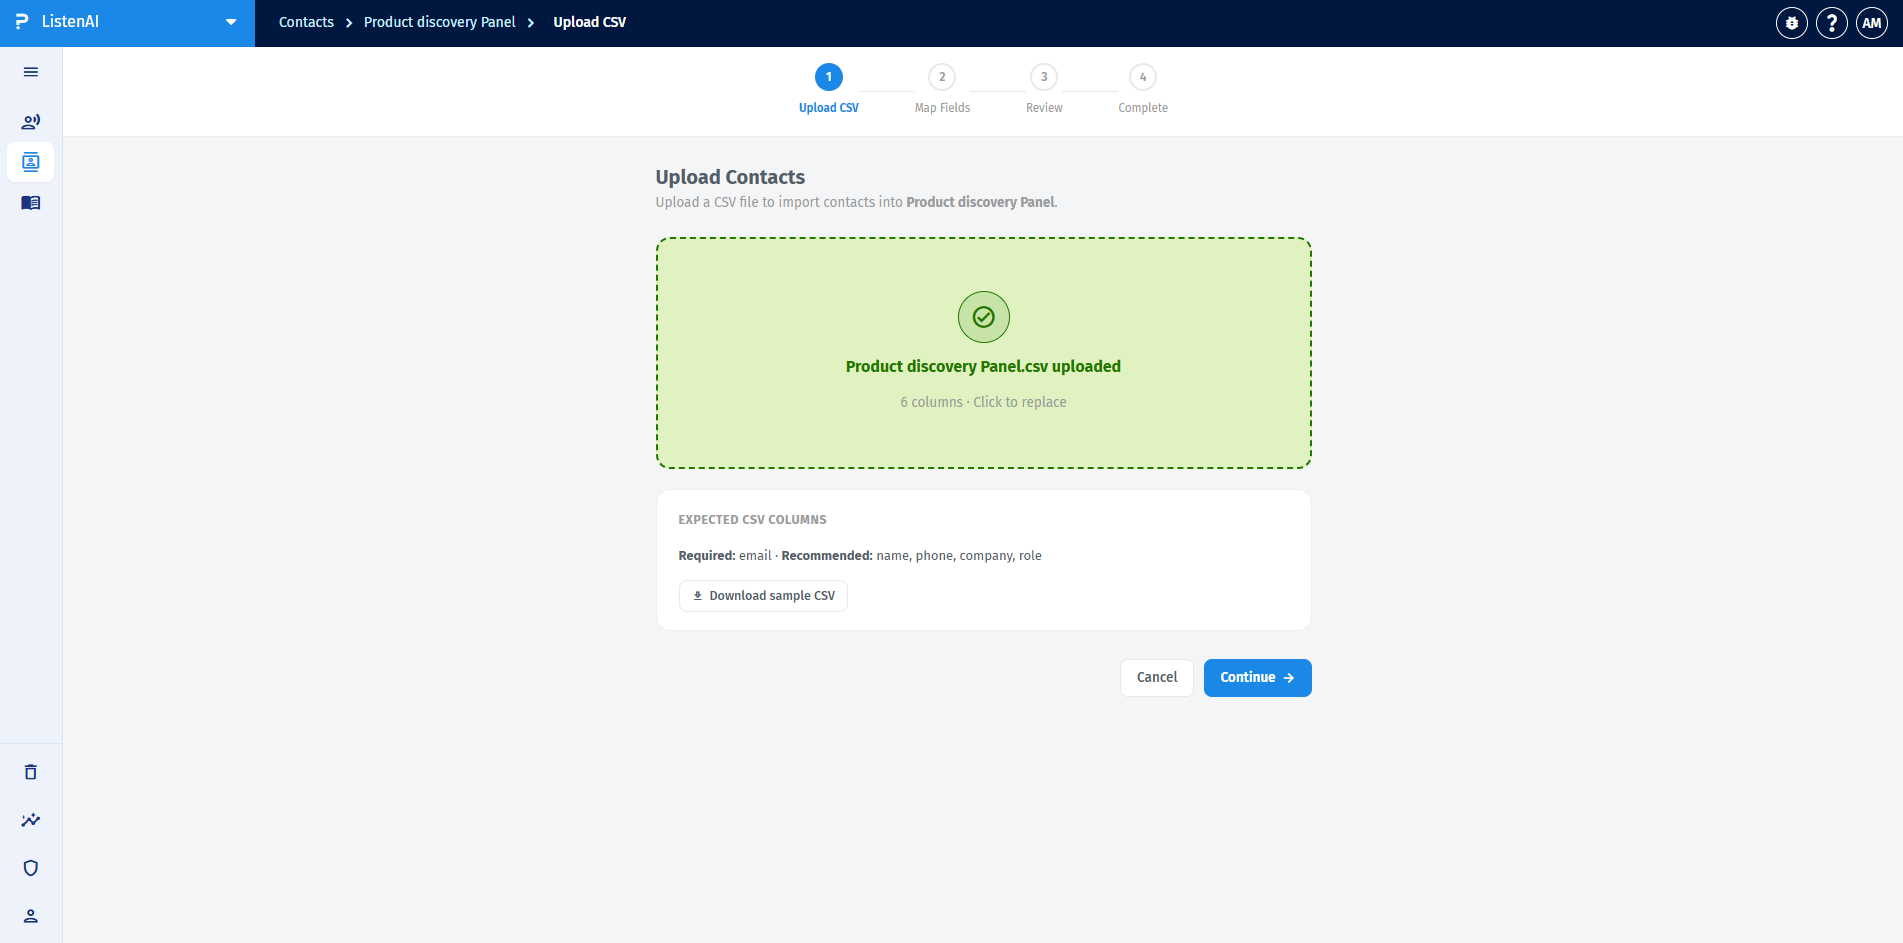
When you choose to upload a CSV file to import contacts, the system will confirm the successful upload and display the expected CSV columns, noting that the "email" field is required. Click Continue to proceed.
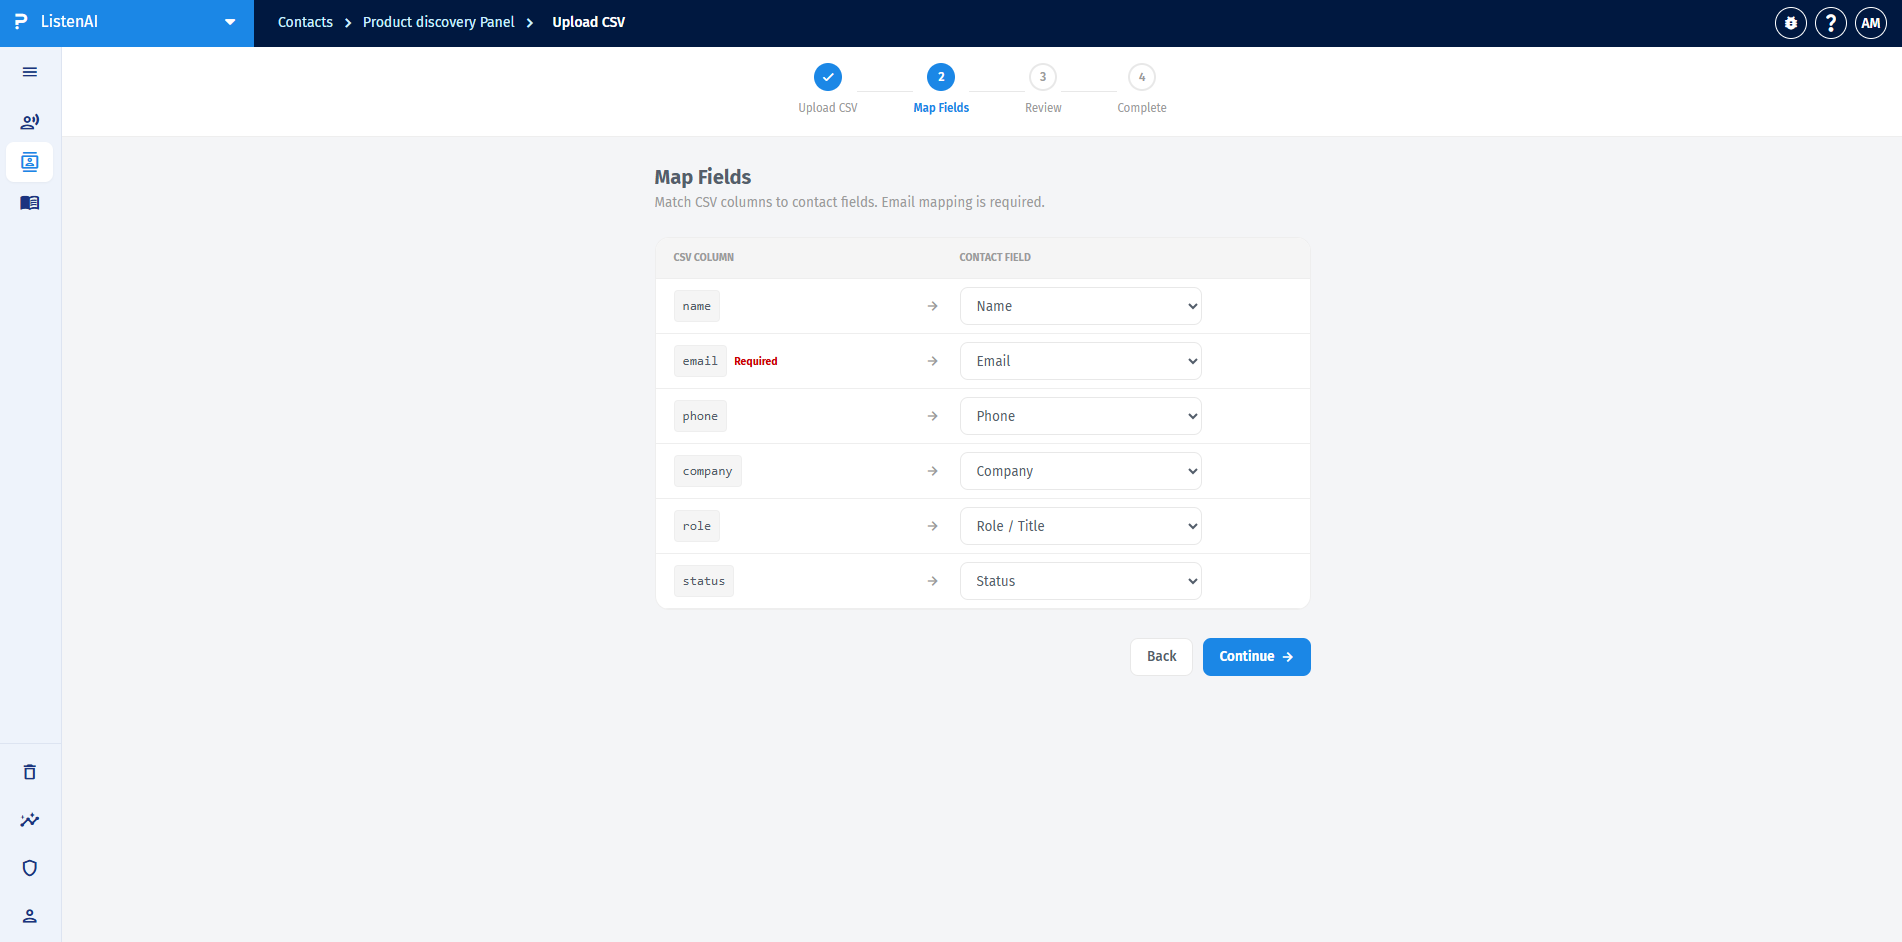
Next, in the Map Fields step, match your CSV columns to the system's contact fields (such as Name, Email, Phone, Company, Role / Title, and Status). The Email mapping is strictly required.
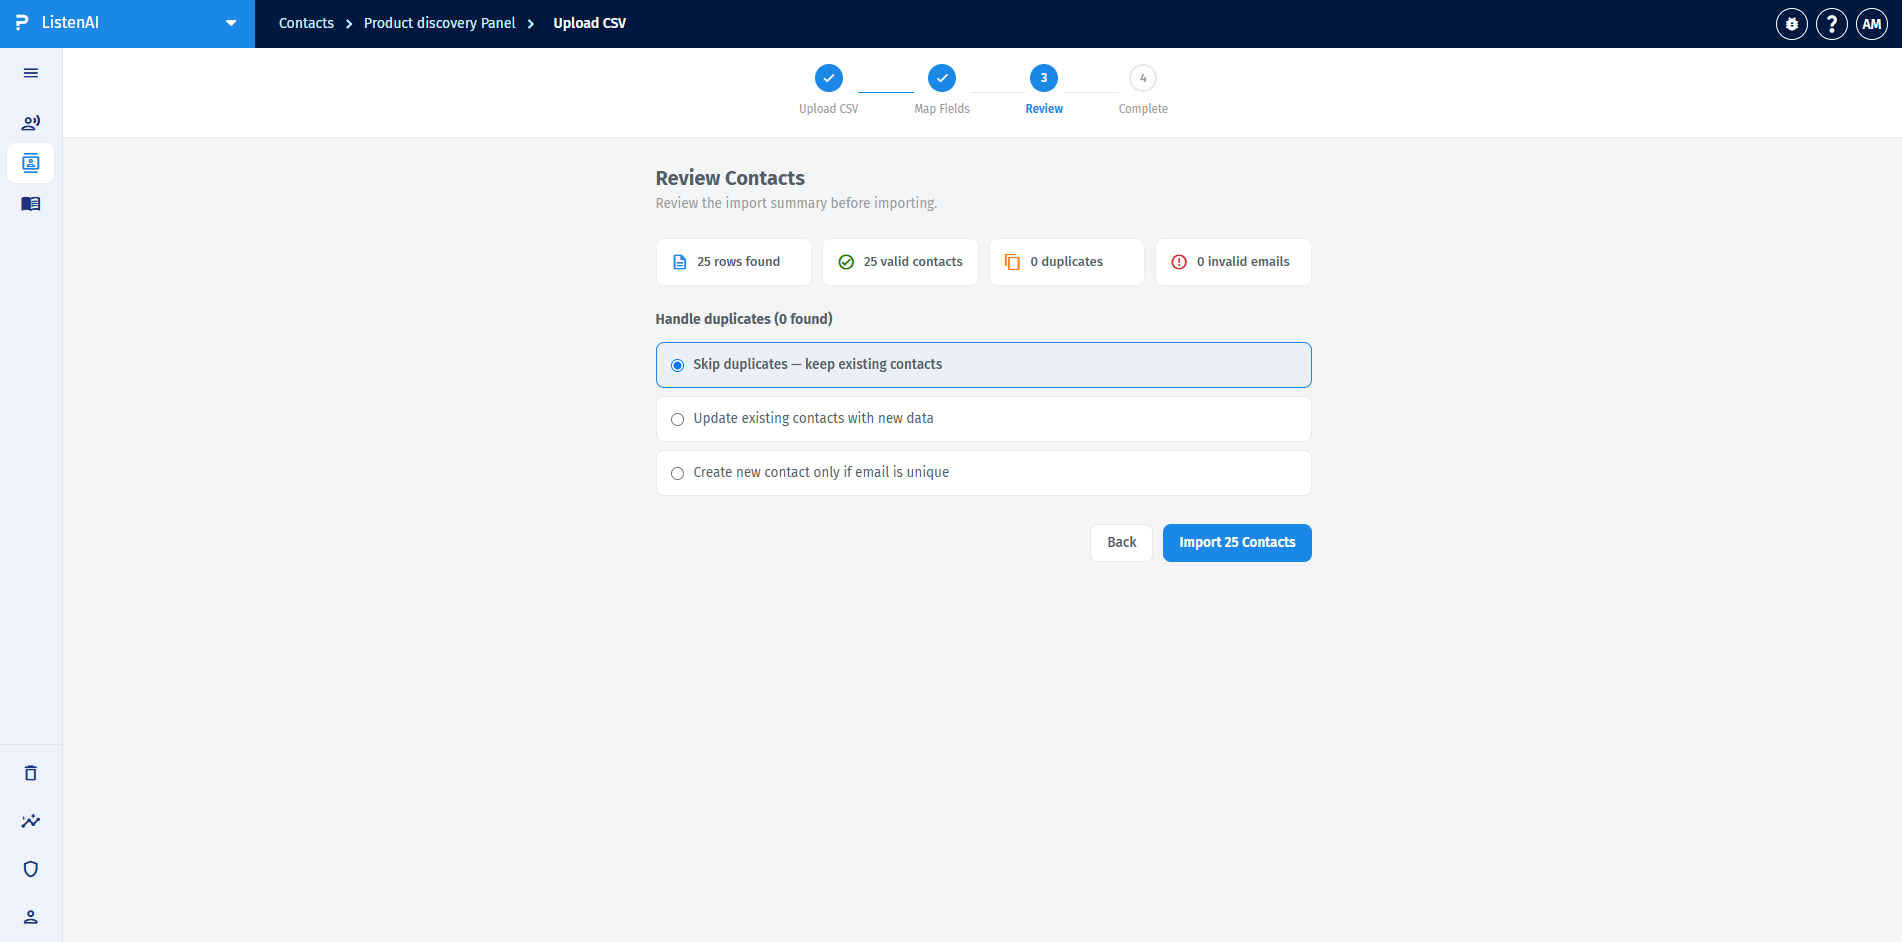
Finally, the Review step displays an import summary, showing the number of rows found, valid contacts, duplicates, and invalid emails. You can determine how to handle duplicates by choosing to "Skip duplicates", "Update existing contacts with new data", or "Create new contact only if email is unique" before clicking the Import Contacts button.
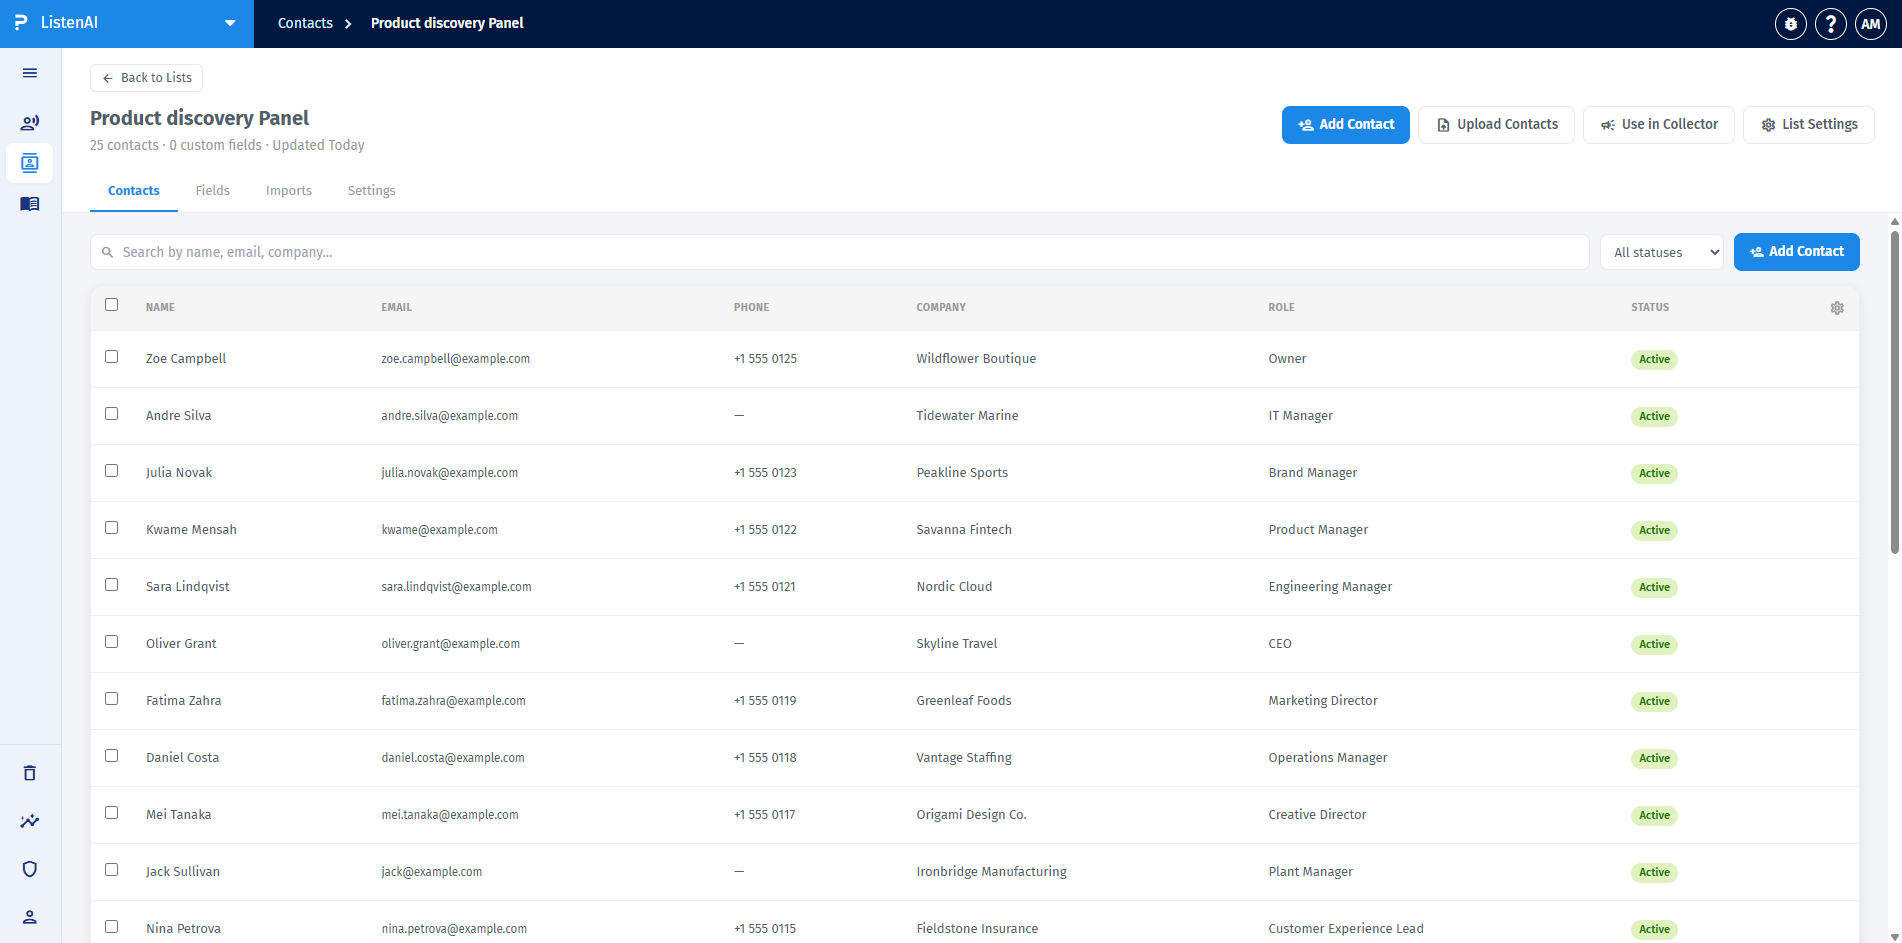
Once imported, you can view your entire panel on the Contacts dashboard. The table displays each participant's Name, Email, Phone, Company, Role, and Status (e.g., Active).
From this view, you can perform additional actions using the buttons at the top right: Add Contact, Upload Contacts, Use in Collector (to begin recruiting them), and List Settings.