


Manage Permissions
Workspace permissions in QuestionPro BI allow you to control who can access and contribute to your workspace.
By assigning appropriate access levels, you can ensure that the right users can view, create, and modify dashboards, reports, and analytical assets while maintaining control over your content.
Permissions can be assigned at multiple levels, including organization-wide access, team-level access, and individual user access. This flexibility allows you to manage collaboration at scale while still maintaining granular control when needed.
Whether you are sharing a workspace broadly across your organization or with a few specific users, permissions help ensure that access is both controlled and aligned with user responsibilities.
Watch this video for a quick overview of how to manage permissions in the BI workspace:
Click to download the video
When sharing a workspace, you can assign either Read Access or Edit Access depending on the level of interaction required.
Users with Read Access can view dashboards, reports, and analytical assets within the workspace, but they cannot make any changes. This level is suitable for stakeholders who need visibility into insights without modifying content.
Users with Edit Access can create, update, and manage dashboards, reports, and analytical assets within the workspace. This level is intended for users who actively contribute to building and maintaining content.
Follow these steps to share your workspace with other users:
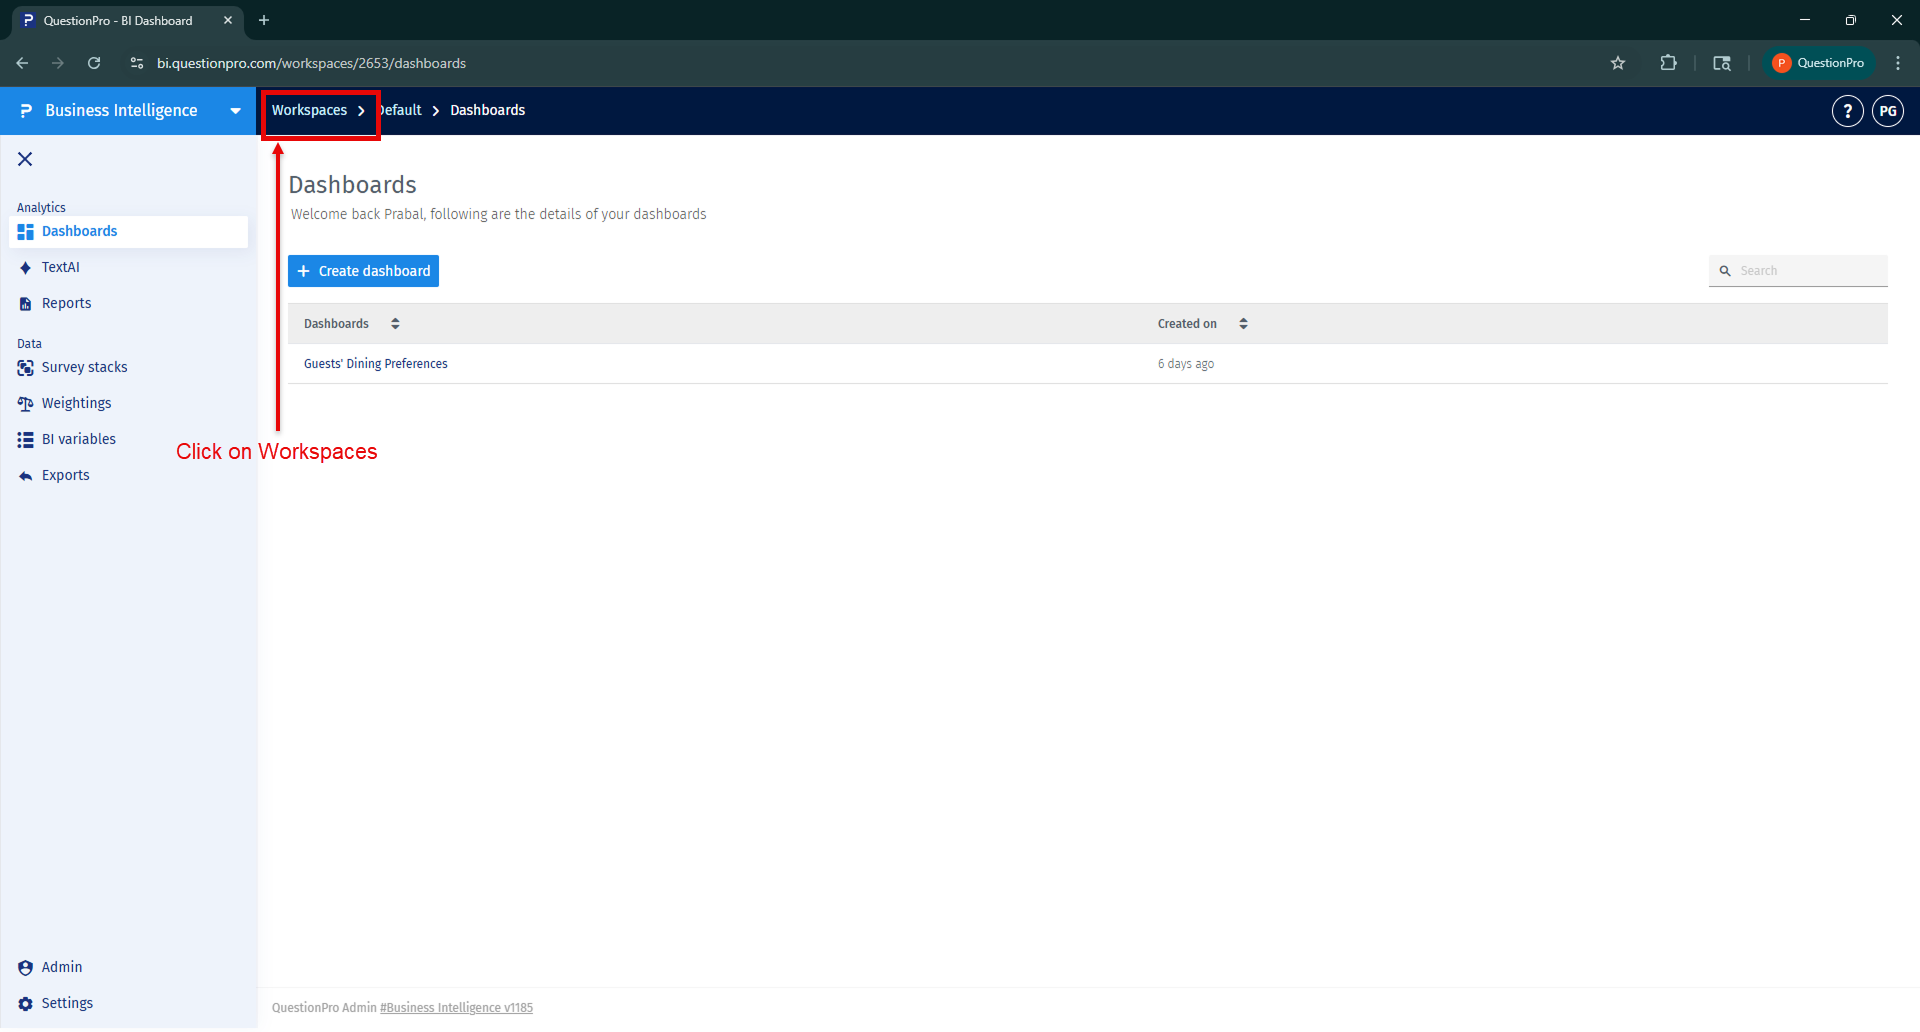
Step 1: Open Workspaces.
From the BI navigation panel, click Workspaces.
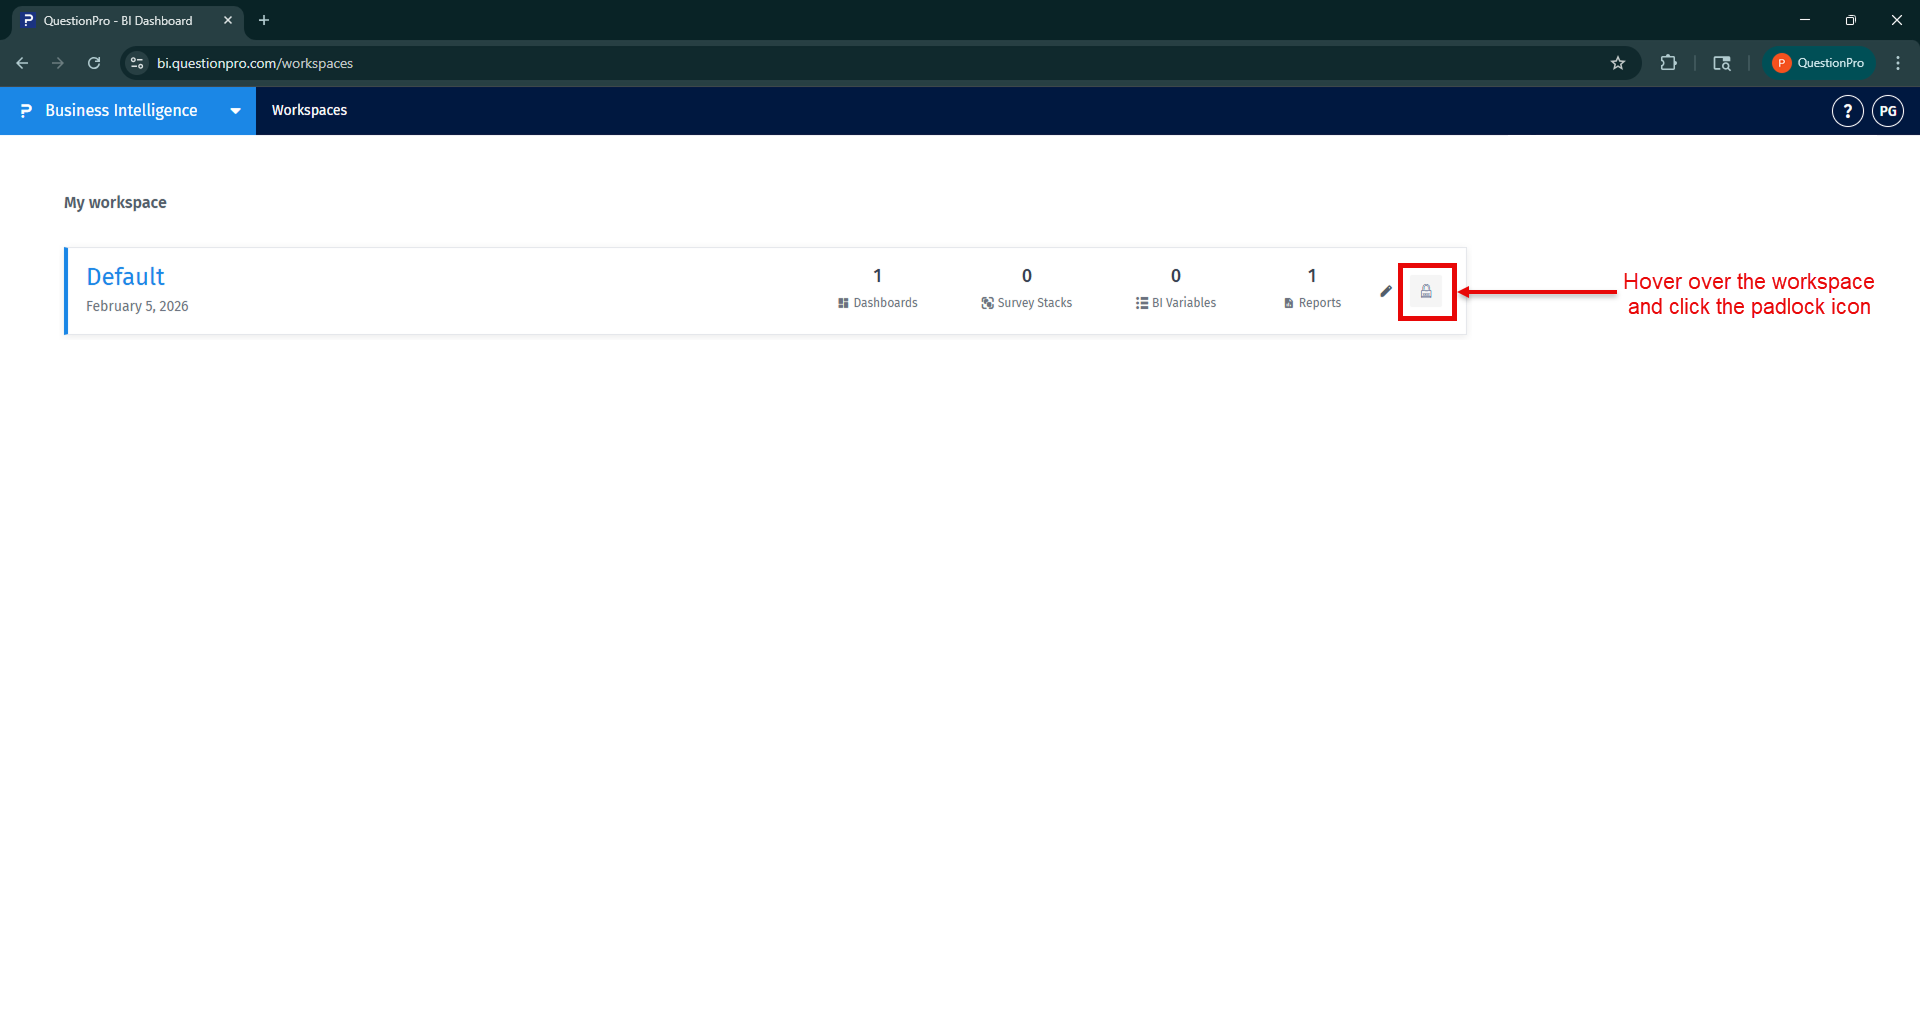
Step 2: Open sharing settings.
Hover over the workspace and click the padlock icon.
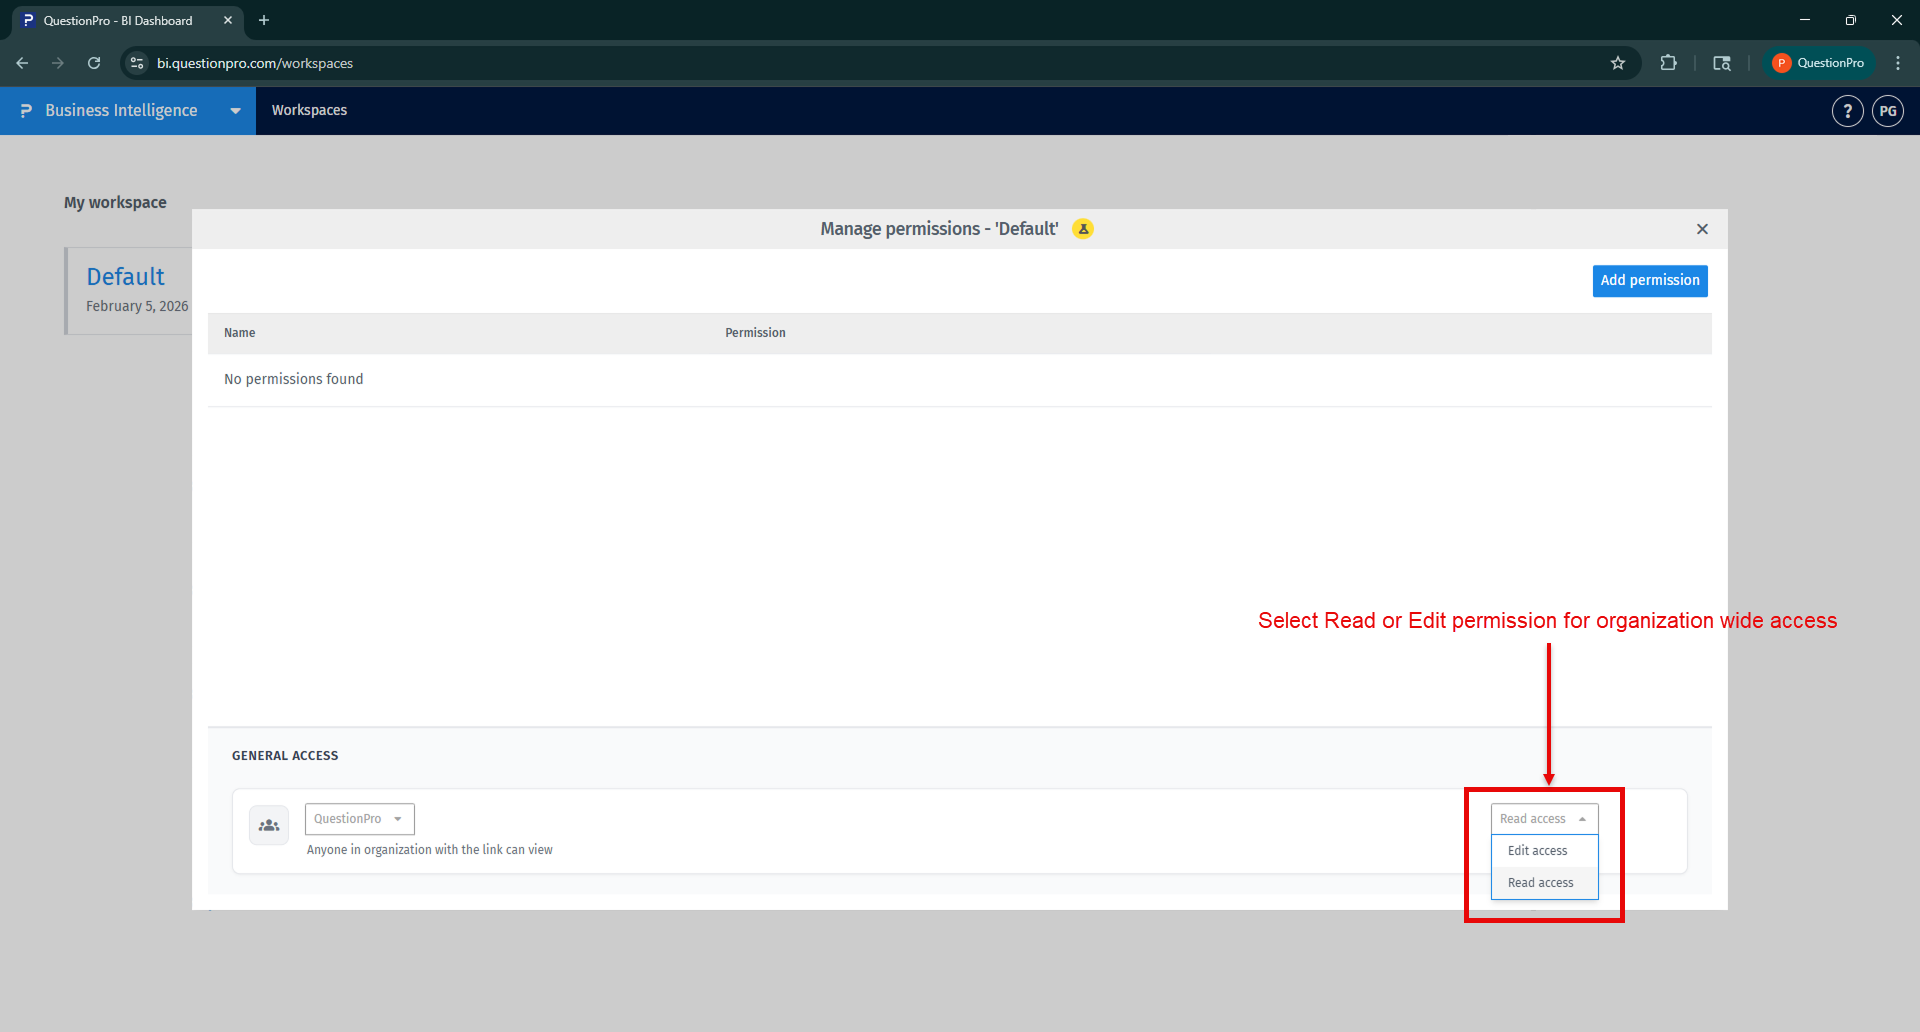
Step 3: Configure general access.
In the popup, use General Access to assign Read or Edit access to everyone in your organization.
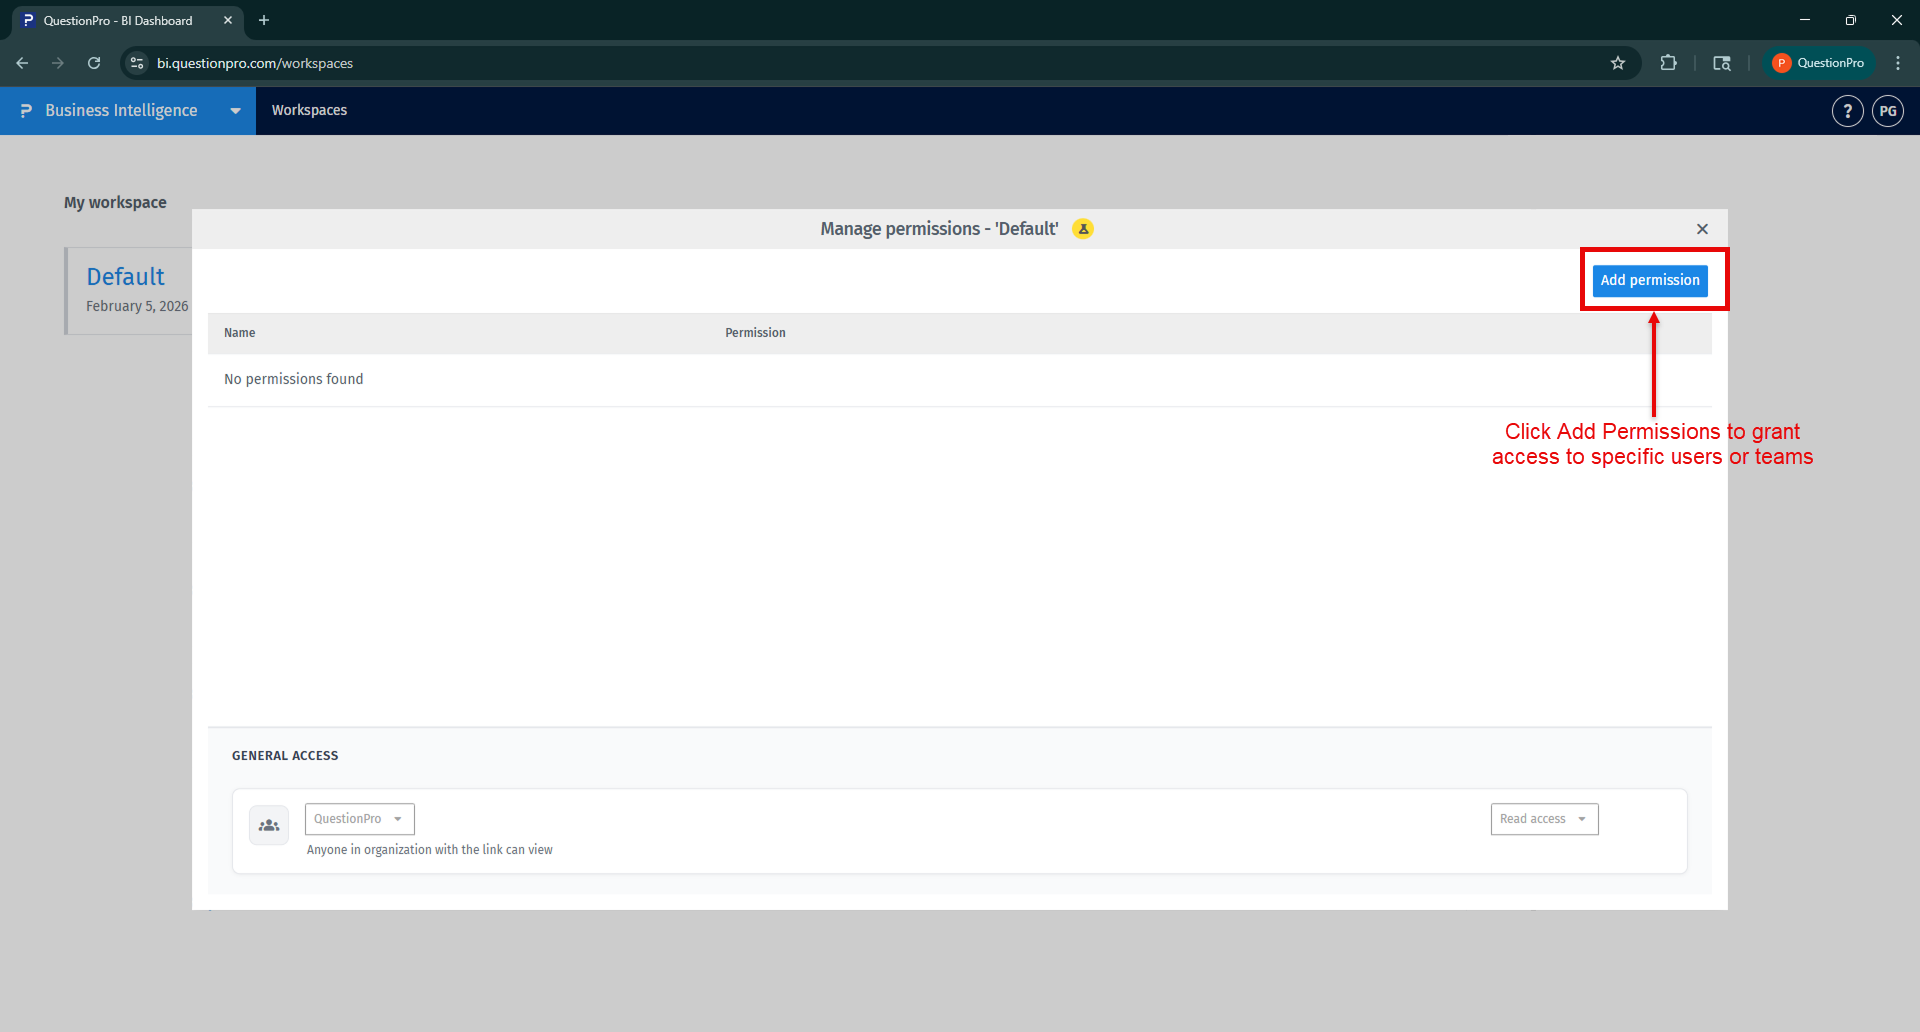
Step 4: Add specific permissions.
Click Add Permissions to grant access to specific users or teams within your organization.
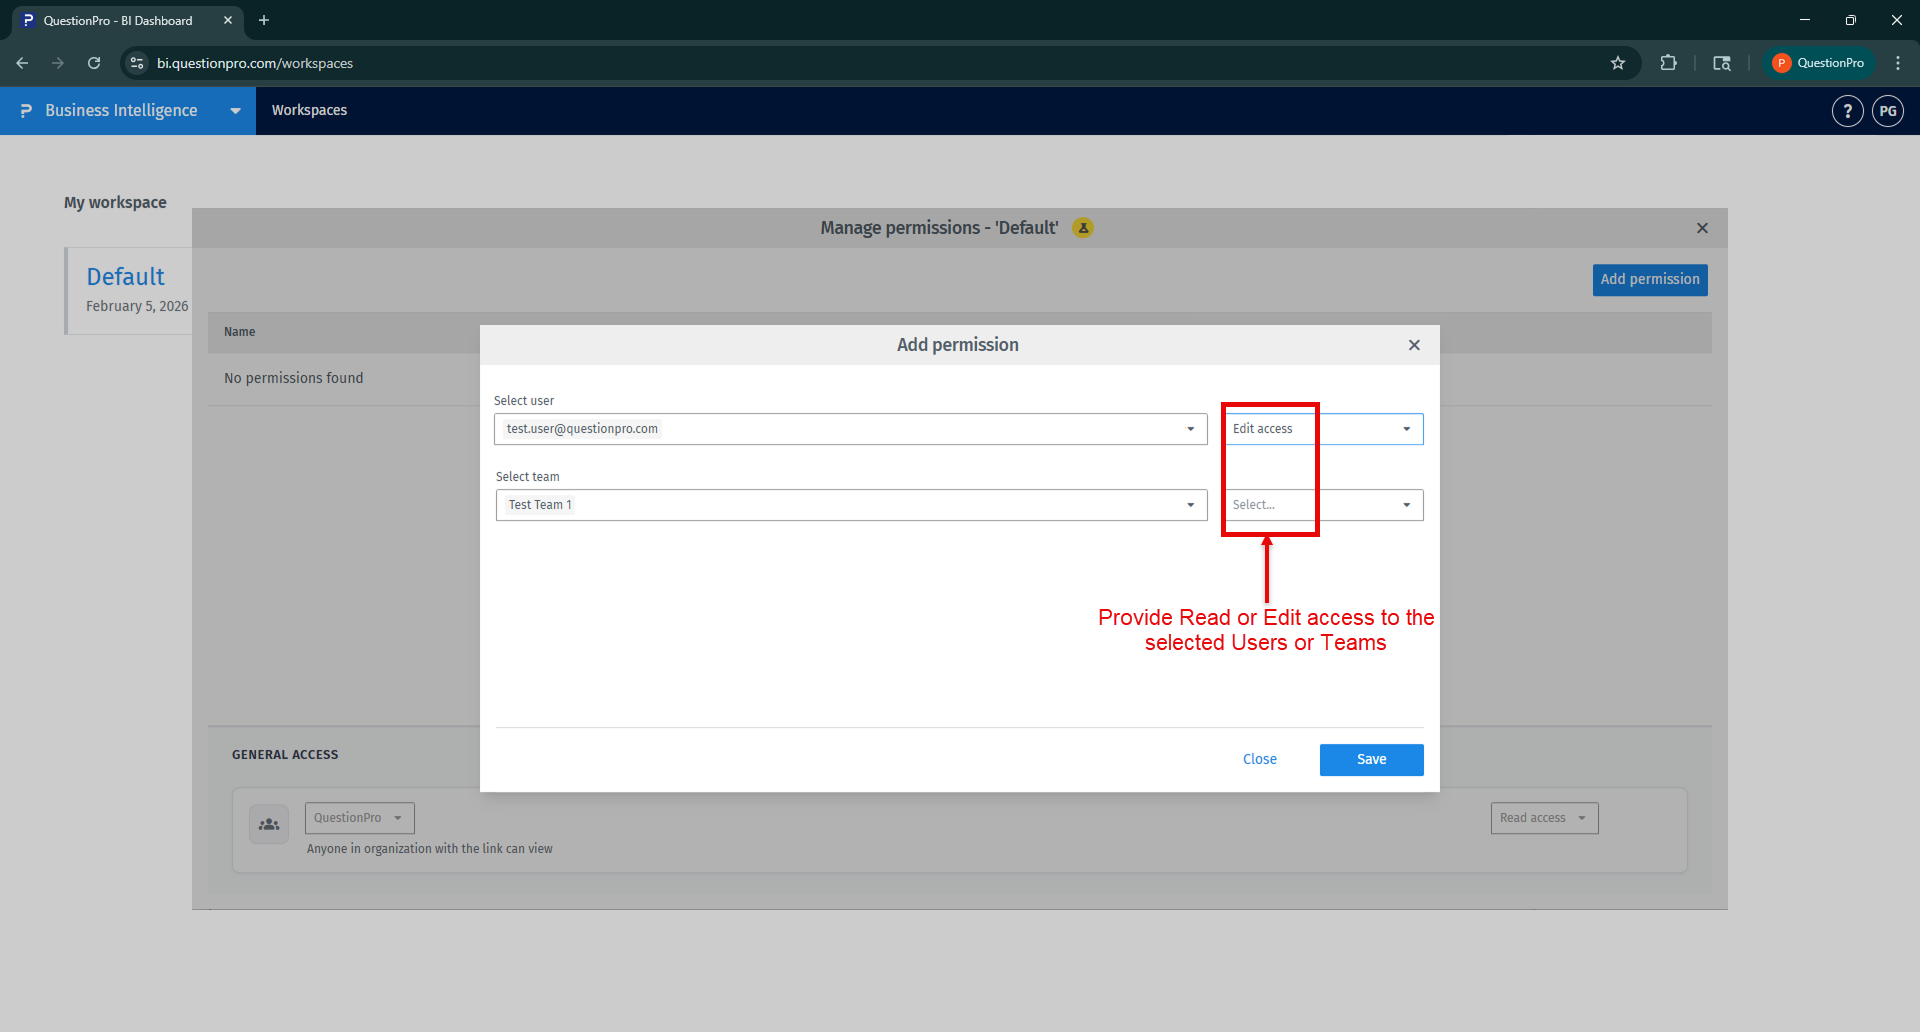
Step 5: Assign access levels.
Select Users or Teams and assign them the desired Read or Edit access.
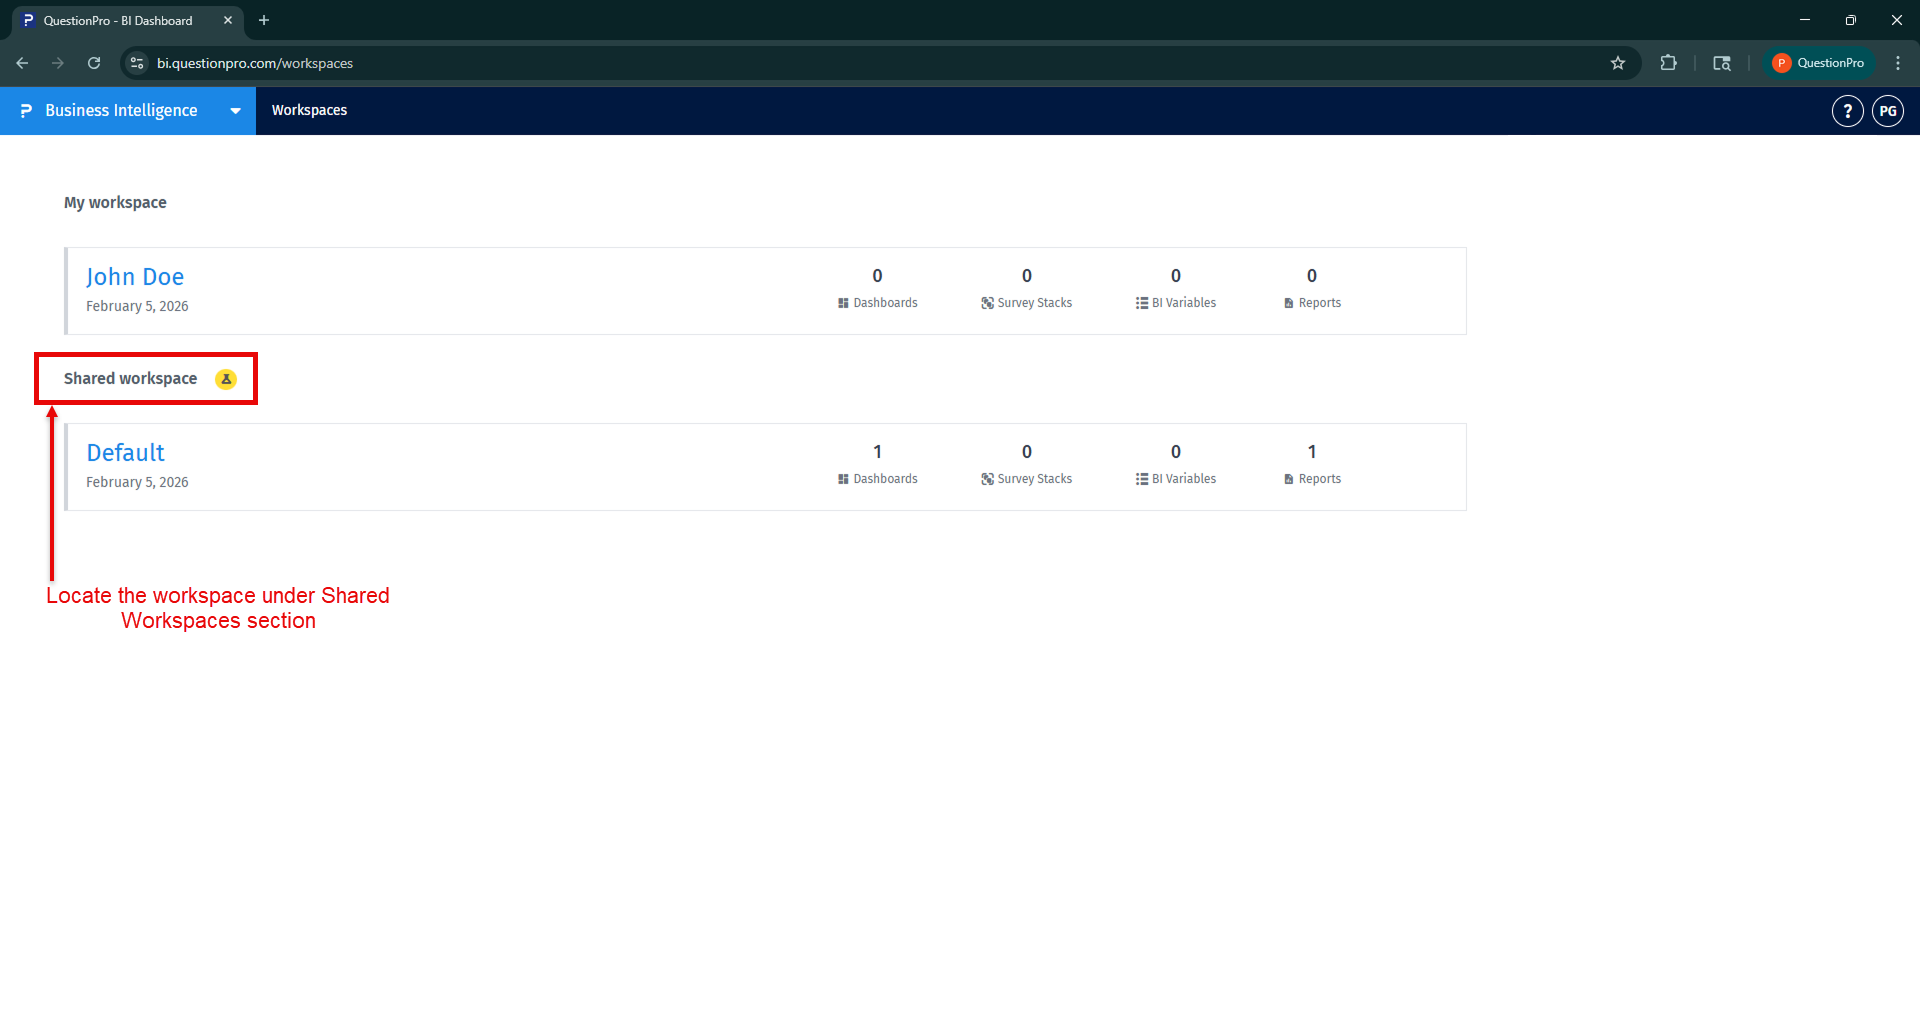
When a workspace is shared with you, it will appear in the Shared Workspaces section.
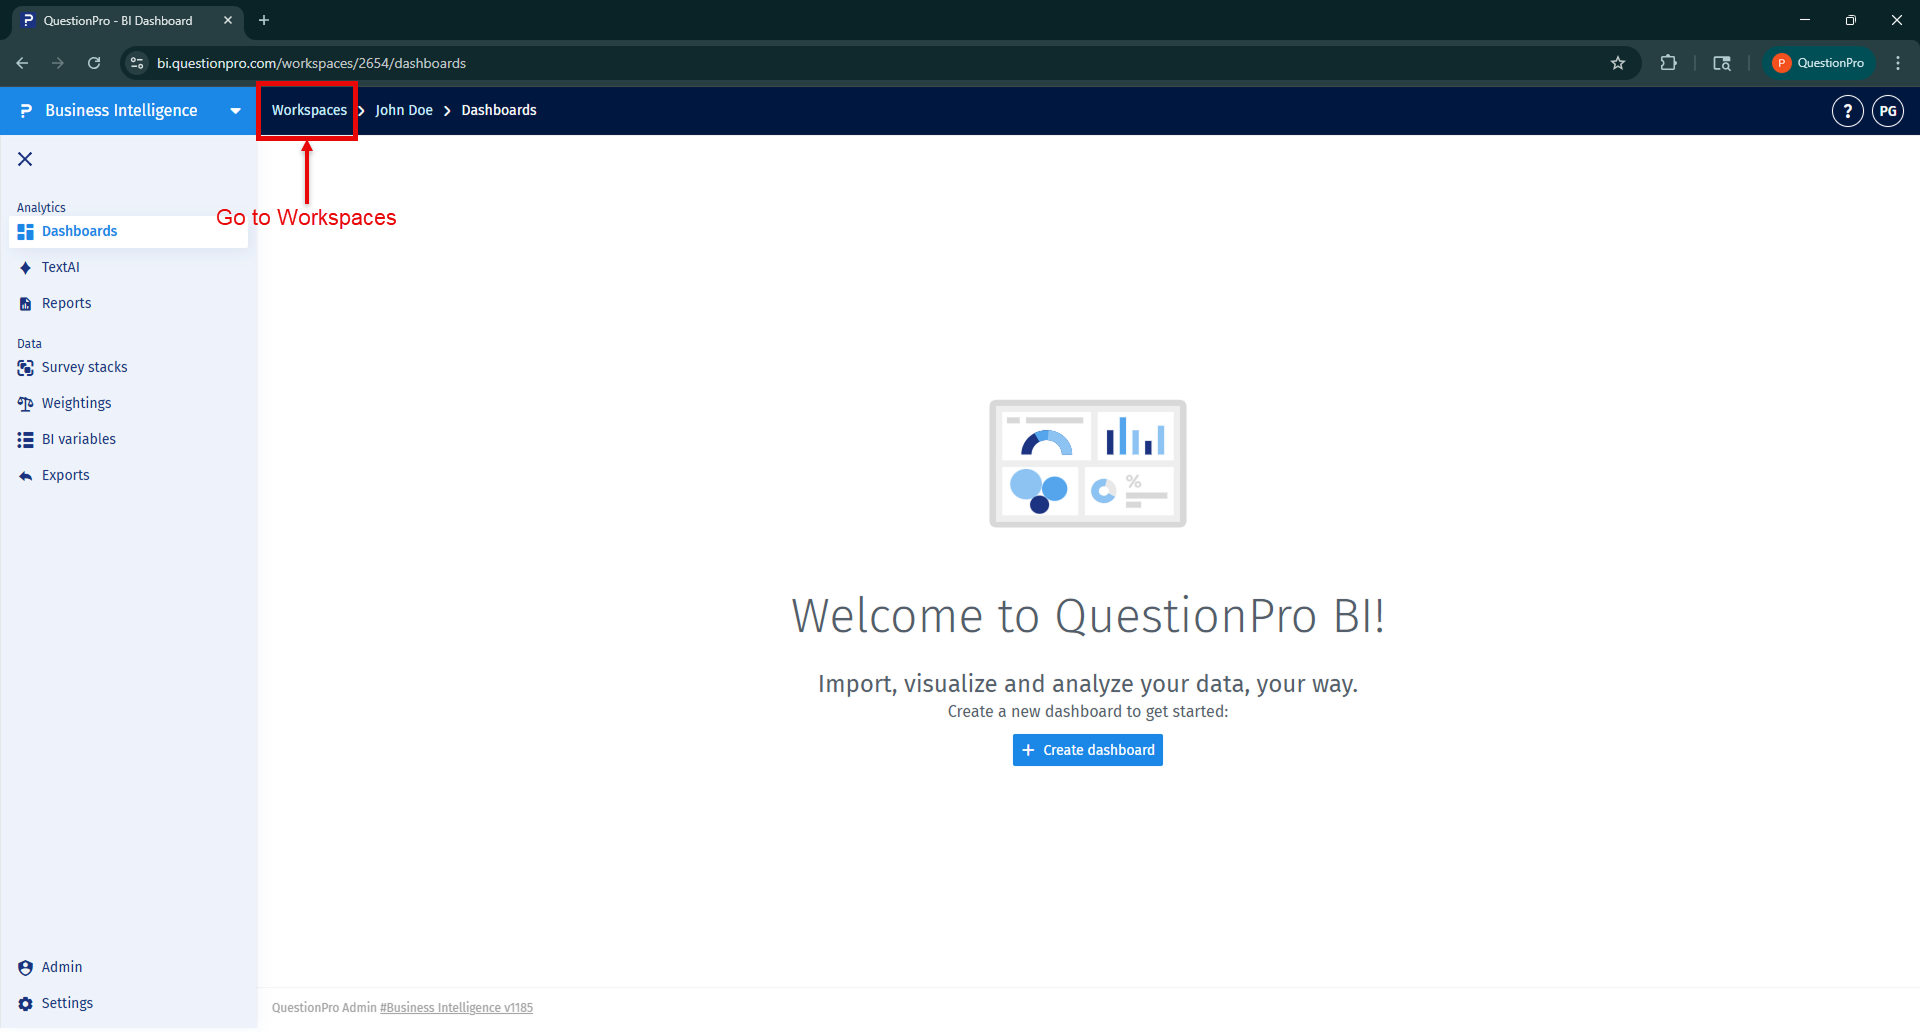
Step 1: Navigate to Workspaces.
Click Workspaces from the BI navigation panel.
Step 2: Locate the shared workspace.
Find the workspace under the Shared Workspaces section.
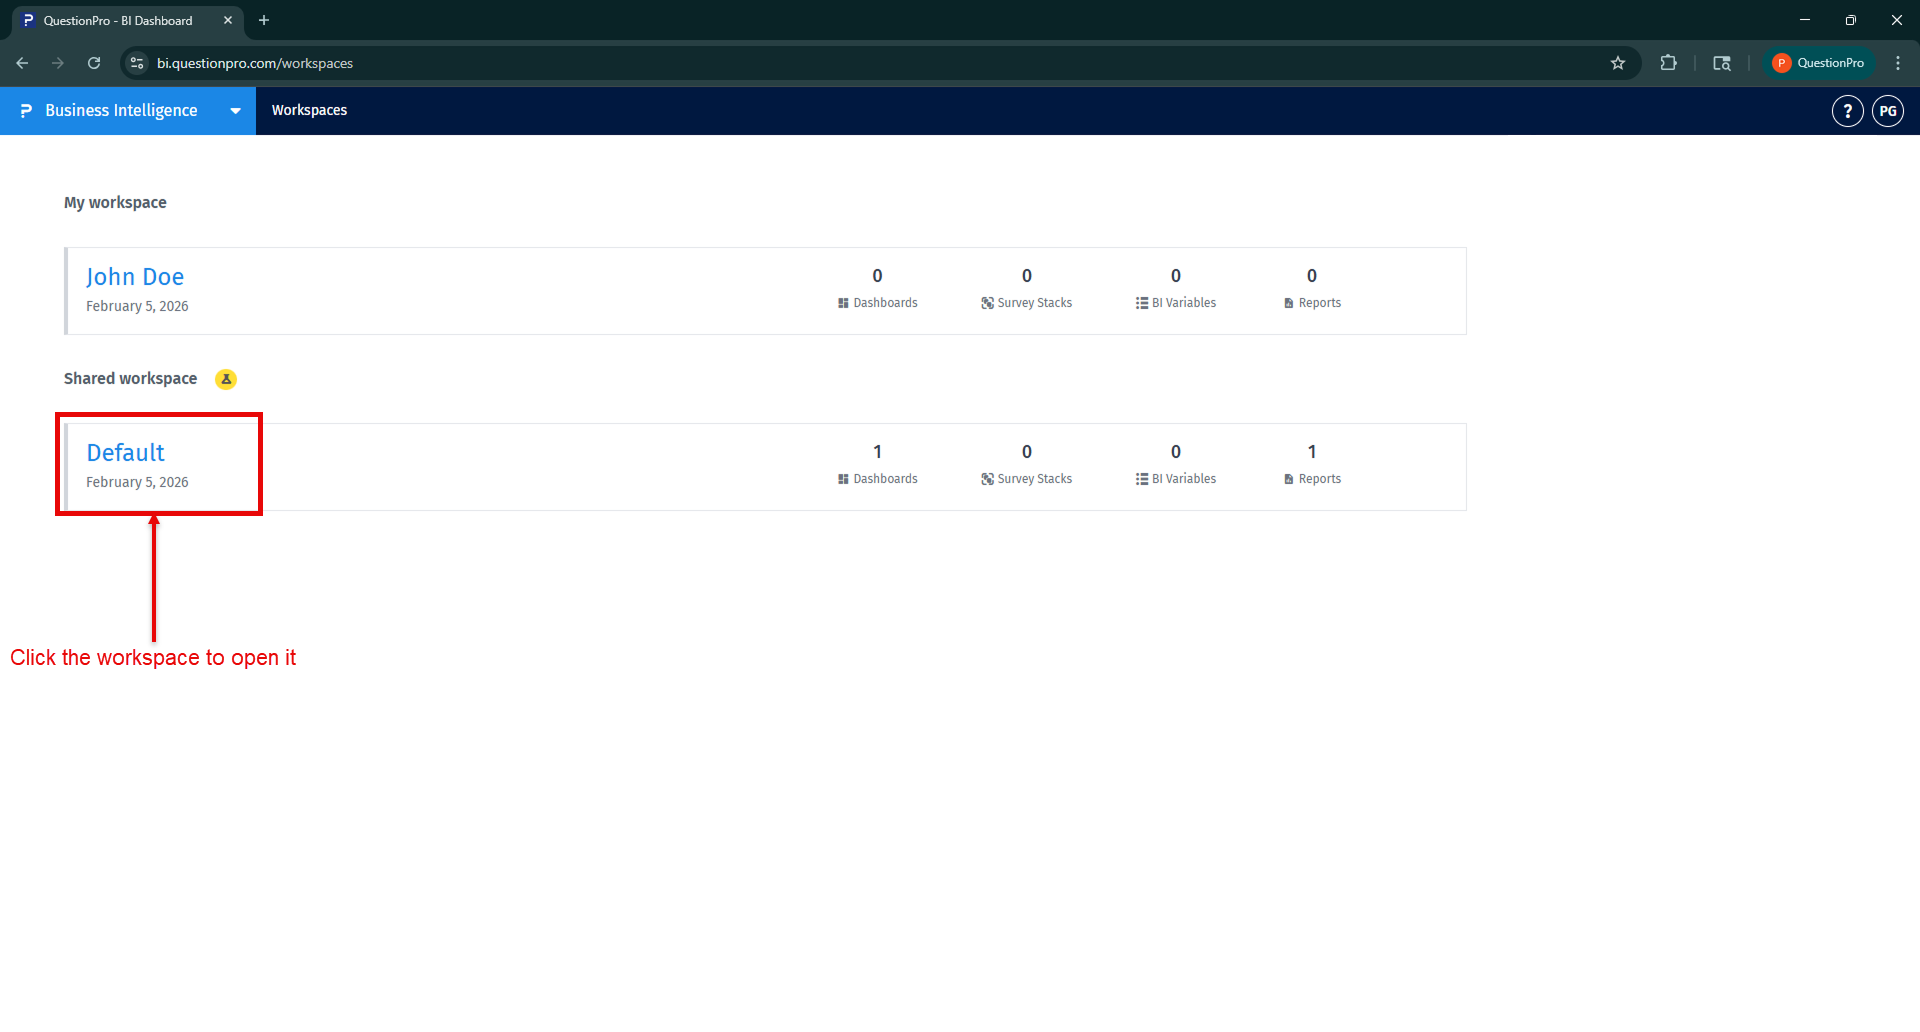
Step 3: Open the workspace.
Click on a workspace to jump in and start working.
Your level of access (read or edit) will determine whether you can only view content or also make changes.
- Assign Edit Access only to users who need to create or modify content.
- Use Read Access for stakeholders who only need to view dashboards.
- Regularly review workspace access to ensure permissions remain relevant.
This feature is available with the following licenses :
Team Edition Research Edition Communities Customer Experience Employee Experience
